操作系统:Linux version 3.10.0-862.el7.x86_64
Gitlab:gitlab-ce14.10.0-ce.0.el7
安装必要依赖#
安装所需的依赖:ssh、postfix(用于邮件通知) 、wget,已安装的可略过。
ssh#
安装ssh,root 用户可不加 sudo
sudo yum install -y curl policycoreutils-pythonopenssh-server设置开机自启动
sudo systemctl enable sshd 启动ssh服务
sudo systemctl start sshdpostfix#
安装 Postfix 用于发送通知邮件
sudo yum install postfix设置开机自启动
sudo systemctl enable postfix启动postfix
sudo systemctl start postfix wget#
wget 用于从外网下载插件,检查系统中是否已经安装:
[root@centos-01 ~]# wget -V
GNU Wget 1.14 在 linux-gnu 上编译。

+digest +https +ipv6 +iri +large-file +nls +ntlm +opie +ssl/openssl

Wgetrc:
    /etc/wgetrc (系统)
字符集: /usr/share/locale
编译: gcc -DHAVE_CONFIG_H -DSYSTEM_WGETRC="/etc/wgetrc"
    -DLOCALEDIR="/usr/share/locale" -I. -I../lib -I../lib -O2 -g -pipe
    -Wall -Wp,-D_FORTIFY_SOURCE=2 -fexceptions -fstack-protector-strong
    --param=ssp-buffer-size=4 -grecord-gcc-switches -m64 -mtune=generic
链接程序: gcc -O2 -g -pipe -Wall -Wp,-D_FORTIFY_SOURCE=2 -fexceptions
    -fstack-protector-strong --param=ssp-buffer-size=4
    -grecord-gcc-switches -m64 -mtune=generic -lssl -lcrypto
    /usr/lib64/libssl.so /usr/lib64/libcrypto.so /usr/lib64/libz.so
    -ldl -lz -lz -lidn -luuid -lpcre ftp-opie.o openssl.o http-ntlm.o
    ../lib/libgnu.a

Copyright (C) 2011 Free Software Foundation, Inc.
授权 GPLv3+: GNU GPL 第三版或更高版本
<http://www.gnu.org/licenses/gpl.html>。
这是自由软件:您可以自由地更改并重新分发它。
在法律所允许的范围内,没有任何担保。

最初由 Hrvoje Nikšić <hniksic@xemacs.org> 编写。
请将错误报告或建议寄给 <bug-wget@gnu.org>。
如果未安装则进行安装,安装命令如下:
yum install wget -yvim#
yum install vim -yGitLab 安装#
yum 方式安装#
注意: gitlab-ce 镜像仅支持 x86-64 架构
Centos 可以通过配置 yum 源然后使用 yum 一键安装,国内可以使用清华大学镜像源安装GitLab速度会快不少。【相关配置安装参考这里】。
将以下内容写入 yum 源配置文件:/etc/yum.repos.d/gitlab-ce.repo
# vim /etc/yum.repos.d/gitlab-ce.repo
[gitlab-ce]
name=Gitlab CE Repository
baseurl=https://mirrors.tuna.tsinghua.edu.cn/gitlab-ce/yum/el$releasever/
gpgcheck=0
enabled=1
yum makecache #将服务器包信息下载到本地缓存
yum install gitlab-ce #自动安装最新版安装指定版本
# yum install gitlab-ce-x.x.x #安装指定版本rpm 方式安装#
wget https://mirrors.tuna.tsinghua.edu.cn/gitlab-ce/yum/el8/gitlab-ce-14.0.0-ce.0.el8.x86_64.rpmrpm -i gitlab-ce-14.0.0-ce.0.el8.x86_64.rpm详细操作请自行查找相关资料。无论使用哪种方式,看到类似如下输出表示安装成功:
Running transaction check
Running transaction test
Transaction test succeeded
Running transaction
  正在安装    : setools-libs-3.3.8-4.el7.x86_64                                                                                         1/8
  正在安装    : libcgroup-0.41-21.el7.x86_64                                                                                            2/8
  正在安装    : audit-libs-python-2.8.5-4.el7.x86_64                                                                                    3/8
  正在安装    : python-IPy-0.75-6.el7.noarch                                                                                            4/8
  正在安装    : libsemanage-python-2.5-14.el7.x86_64                                                                                    5/8
  正在安装    : checkpolicy-2.5-8.el7.x86_64                                                                                            6/8
  正在安装    : policycoreutils-python-2.5-34.el7.x86_64                                                                                7/8
  正在安装    : gitlab-ce-14.10.0-ce.0.el7.x86_64                                                                                       8/8
It looks like GitLab has not been configured yet; skipping the upgrade script.

       *.                  *.
      ***                 ***
     *****               *****
    .******             *******
    ********            ********
   ,,,,,,,,,***********,,,,,,,,,
  ,,,,,,,,,,,*********,,,,,,,,,,,
  .,,,,,,,,,,,*******,,,,,,,,,,,,
      ,,,,,,,,,*****,,,,,,,,,.
         ,,,,,,,****,,,,,,
            .,,,***,,,,
                ,*,.


     _______ __  __          __
    / ____(_) /_/ /   ____ _/ /_
   / / __/ / __/ /   / __ `/ __ \
  / /_/ / / /_/ /___/ /_/ / /_/ /
  \____/_/\__/_____/\__,_/_.___/


Thank you for installing GitLab!
GitLab was unable to detect a valid hostname for your instance.
Please configure a URL for your GitLab instance by setting `external_url`
configuration in /etc/gitlab/gitlab.rb file.
Then, you can start your GitLab instance by running the following command:
  sudo gitlab-ctl reconfigure

For a comprehensive list of configuration options please see the Omnibus GitLab readme
https://gitlab.com/gitlab-org/omnibus-gitlab/blob/master/README.md

Help us improve the installation experience, let us know how we did with a 1 minute survey:
https://gitlab.fra1.qualtrics.com/jfe/form/SV_6kVqZANThUQ1bZb?installation=omnibus&release=14-10

  验证中      : checkpolicy-2.5-8.el7.x86_64                                                                                            1/8
  验证中      : libsemanage-python-2.5-14.el7.x86_64                                                                                    2/8
  验证中      : python-IPy-0.75-6.el7.noarch                                                                                            3/8
  验证中      : policycoreutils-python-2.5-34.el7.x86_64                                                                                4/8
  验证中      : audit-libs-python-2.8.5-4.el7.x86_64                                                                                    5/8
  验证中      : libcgroup-0.41-21.el7.x86_64                                                                                            6/8
  验证中      : gitlab-ce-14.10.0-ce.0.el7.x86_64                                                                                       7/8
  验证中      : setools-libs-3.3.8-4.el7.x86_64                                                                                         8/8

已安装:
  gitlab-ce.x86_64 0:14.10.0-ce.0.el7

作为依赖被安装:
  audit-libs-python.x86_64 0:2.8.5-4.el7         checkpolicy.x86_64 0:2.5-8.el7                     libcgroup.x86_64 0:0.41-21.el7
  libsemanage-python.x86_64 0:2.5-14.el7         policycoreutils-python.x86_64 0:2.5-34.el7         python-IPy.noarch 0:0.75-6.el7
  setools-libs.x86_64 0:3.3.8-4.el7

完毕!默认路径#
安装完成后可以利用 rpm -ql gitlab-ce 查看其文件安装路径及相关文件路径:
- 默认安装路径:
/opt/gitlab/ - 程序数据及配置文件保存路径:
/var/opt/gitlab - 代码仓库保存位置:
/var/opt/gitlab/git-data/repositories/ - 代码仓库备份位置:
/var/opt/gitlab/backups/ - postgresql数据及配置目录:
/var/opt/gitlab/postgresql/data/ - redis默认配置目录:
/var/opt/gitlab/redis - gitlab主要配置文件:
/etc/gitlab/gitlab.rb
GitLab 配置修改#
修改配置文件指定服务器ip和自定义端口:
vim  /etc/gitlab/gitlab.rb

external_url 'http://localhost:8888'
注意:这里设置的端口不能被占用,默认是8080端口,如果8080已经使用,请自定义其它端口,并在防火墙设置开放相对应端口,我这里直接使用
8888
重置并启动 GitLab
gitlab-ctl reconfigure
gitlab-ctl restart[root@localhost ~]# gitlab-ctl restart
ok: run: alertmanager: (pid 88474) 1s
ok: run: gitaly: (pid 88487) 0s
ok: run: gitlab-exporter: (pid 88502) 0s
ok: run: gitlab-kas: (pid 88504) 1s
ok: run: gitlab-workhorse: (pid 88516) 0s
ok: run: grafana: (pid 88529) 1s
ok: run: logrotate: (pid 88541) 0s
ok: run: nginx: (pid 88547) 1s
ok: run: node-exporter: (pid 88556) 0s
ok: run: postgres-exporter: (pid 88563) 0s
ok: run: postgresql: (pid 88572) 0s
ok: run: prometheus: (pid 88584) 0s
ok: run: puma: (pid 88601) 0s
ok: run: redis: (pid 88606) 0s
ok: run: redis-exporter: (pid 88612) 1s
ok: run: sidekiq: (pid 88696) 0s提示 “ok: run:“表示启动成功
GitLab 访问#
如果没有域名,直接输入服务器ip和指定端口进行访问。
注意:gitlab-ce-14初装后,将密码放在
/etc/gitlab/initial_root_password临时文件中 ,这个文件将在首次执行reconfigure后24小时自动删除,所以拿到密码后尽快登陆Web界面进行密码修改
[root@localhost ~]# cat /etc/gitlab/initial_root_password
# WARNING: This value is valid only in the following conditions
#          1. If provided manually (either via `GITLAB_ROOT_PASSWORD` environment variable or via `gitlab_rails['initial_root_password']` setting in `gitlab.rb`, it was provided before database was seeded for the first time (usually, the first reconfigure run).
#          2. Password hasn't been changed manually, either via UI or via command line.
#
#          If the password shown here doesn't work, you must reset the admin password following https://docs.gitlab.com/ee/security/reset_user_password.html#reset-your-root-password.

Password: HjGOs7XePmSXYSbncxu7UDujhh+SWxyjVkxTvVPpbf8=

# NOTE: This file will be automatically deleted in the first reconfigure run after 24 hours.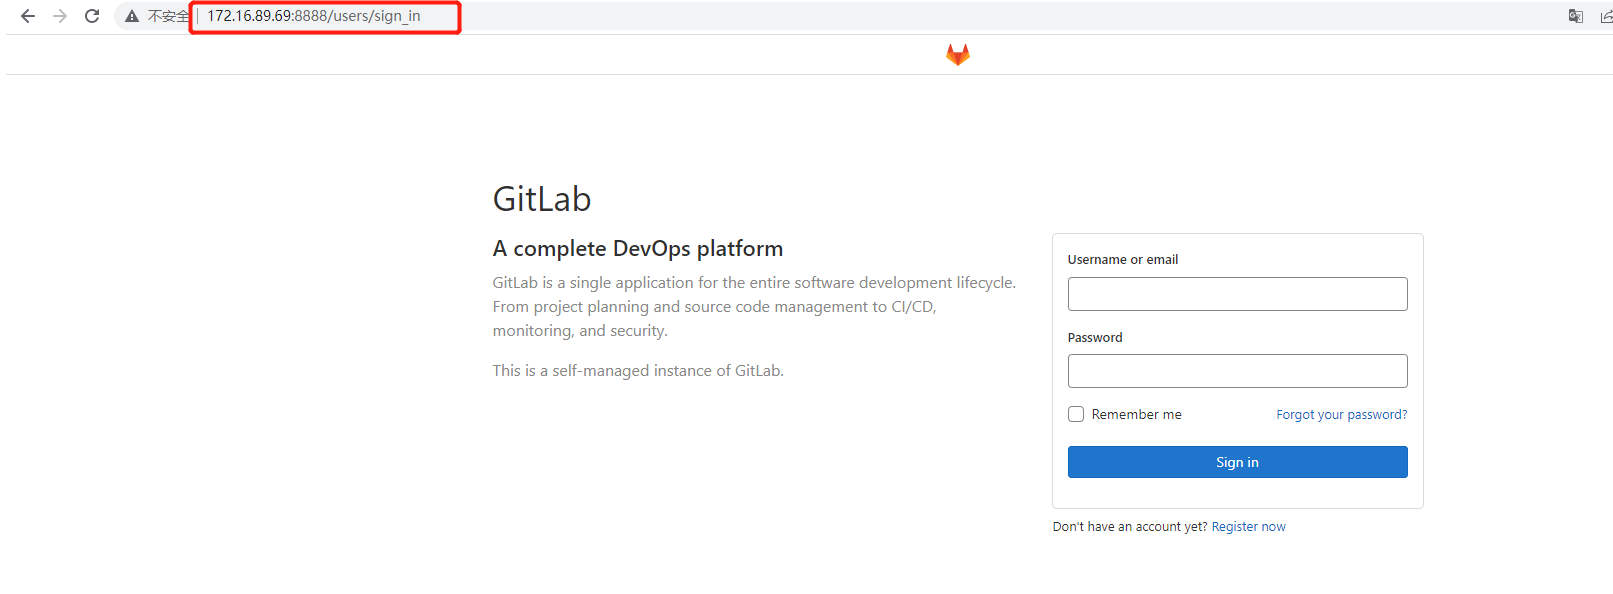
GitLab 常用命令#
gitlab-ctl start    # 启动所有 gitlab 组件
gitlab-ctl stop     # 停止所有 gitlab 组件
gitlab-ctl restart  # 重启所有 gitlab 组件
gitlab-ctl status   # 查看服务状态
gitlab-ctl reconfigure           # 启动服务
vim /etc/gitlab/gitlab.rb        # 修改默认的配置文件
gitlab-rake gitlab:check SANITIZE=true --trace    # 检查gitlab
sudo gitlab-ctl tail        # 查看日志
gitlab-ctl --help           # 查看更多命令